Pool Filter Page 2
An in-line pool filter

Note: All photographs appearing on this page are freely usable for any purpose. Links to high-resolution versions of the pictures appear below each picture.
Pool Filter Versions 5, 6, 7, and 8
After using Version 4 for about a week, I discovered several improvements that could be made to the design.
The first issue was that the strainer needed to be taller and the bracket correspondingly shorter. The Version 4 strainer was only 6.5" tall (not counting the cone on the top) and 2.5" of that was solid (no holes). This means that the active straining area is only 4" tall. Having so few holes decreases the suction going to the pool sweep and, therefore, reduces the efficiency of the pool sweep. So for the following designs I increased the height of the strainer and reduced the "dead space" (areas with no holes) to increase water flow through the strainer. So version 5 was a design change that extended the strainer to the maximum size allowed by the Taz 6 (a little over 10") while shrinking the bracket appropriately.
High-resolution image shot with a Canon EOS 5D MII
There were a couple of other improvements made to the Version 5 (and 6) bracket. Notice there are only three arms/blades rather than the four found in previous versions. This reduces plastic usage, reduces print time, and increases cannister capacity. I could probably have even gone down to two blades, but three seemed like a good place to stop.
A second improvement was to add a 10-degree pitch to the three blades. This cause the water to circulate slightly in the cannister, which improves the packing of the debris in the cannister.
If you look closely at the Version 4 (and 5) strainer, you'll notice that the outer circumference of the strainer is relatively smooth (well, as smooth as you're going to get with a LulzBot Taz 6 with a 0.5mm nozzle).
I had originally applied a smooth face (intentionally) to give the strainer a more "polished" look (originally there were some rough edges that were artifacts from wraping extruded triangles around a circular shape). This turned out to be a bad idea. The moment a leaf hits the side of the strainer, it almost complete blocks all flow through the holes it covers up. By the time a couple dozen leaves enter the filter, the strainer is almost completely plugged up even though the cannister is far from full.
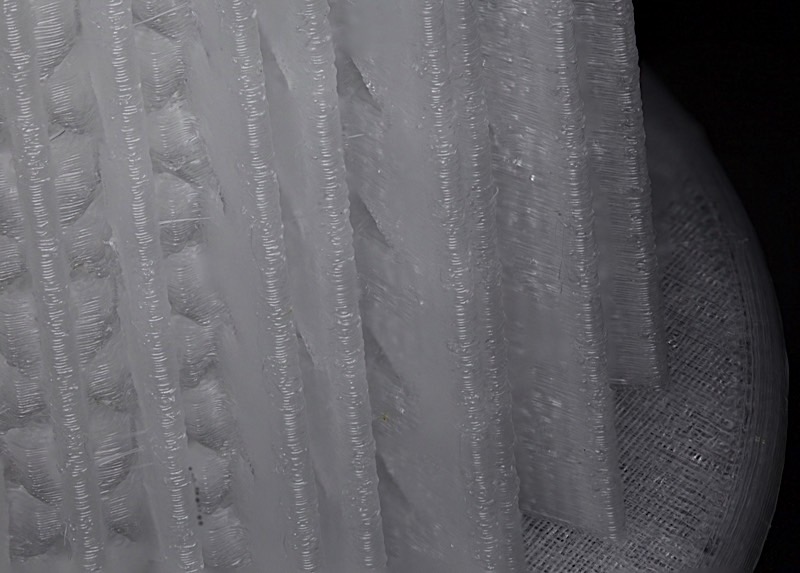
My solution for Version 6 of the strainer was to add some semicircular groove into the side of the strainer. This allowed decent water flow even when the cannister started filling up.
 High-resolution image shot with a Canon EOS 5D MII
Here's a close-up showing the ridges in detail:
 High-resolution image shot with a Canon EOS 5D MII
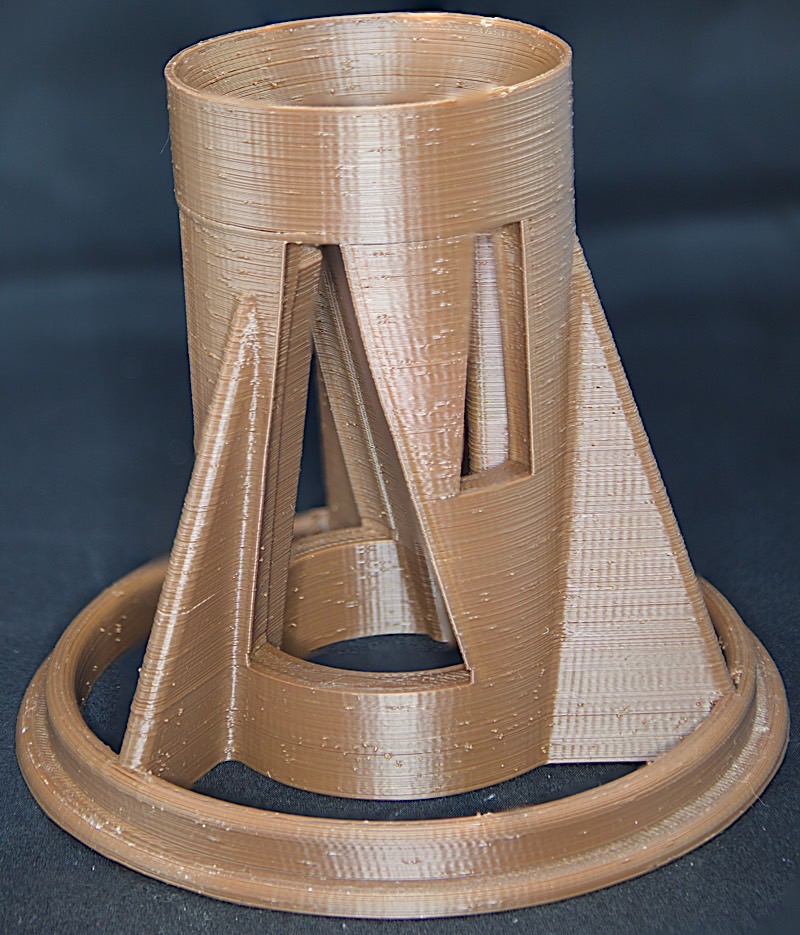
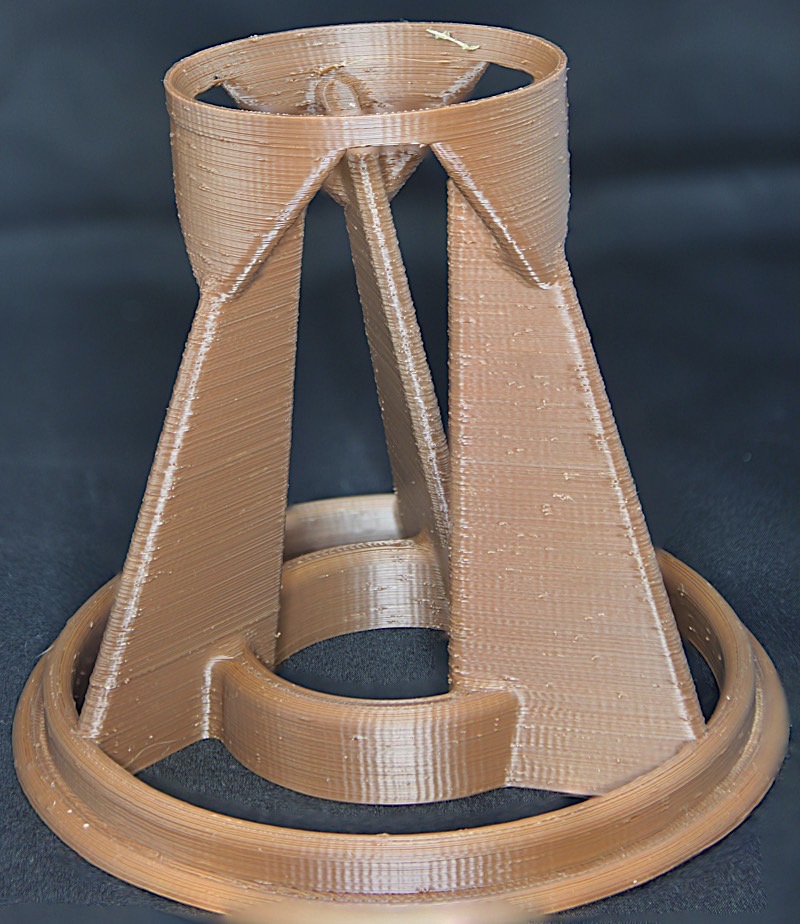
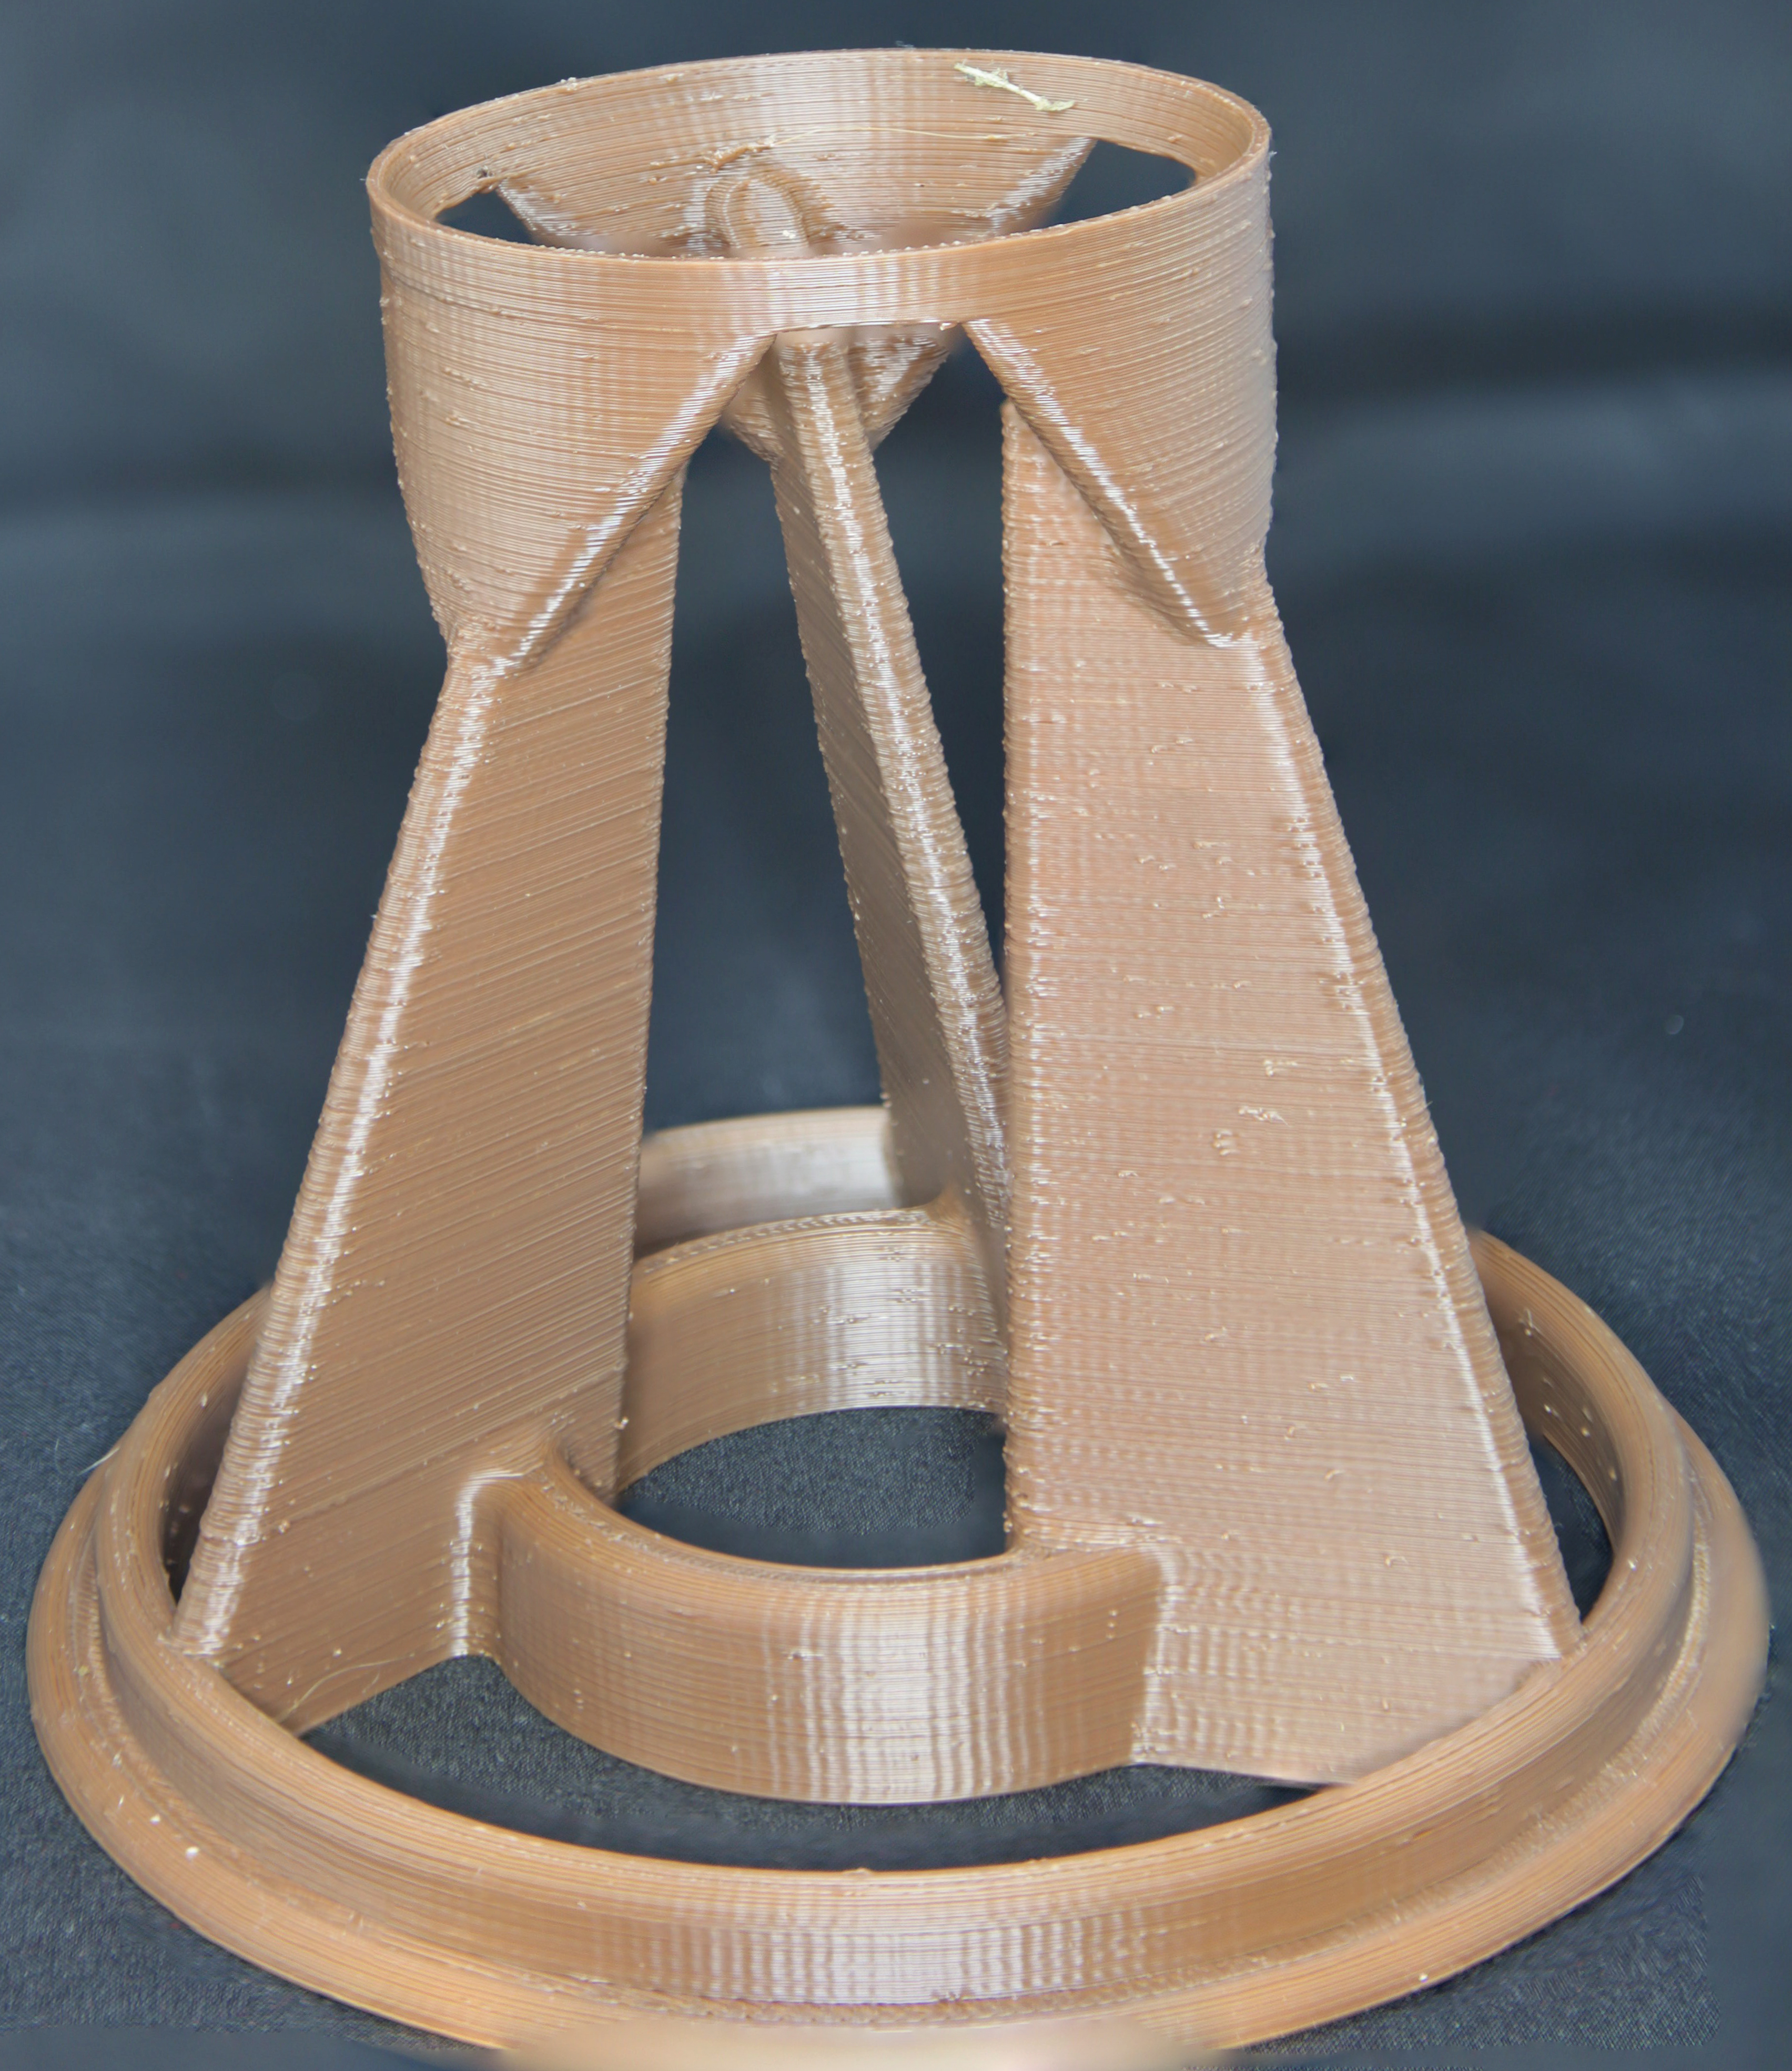
About the only major problem with Version 6 was that the exit holes in the bracket were getting prematurely clogged with large leaves. Therefore, I redesigned the brack to eliminate as much of the inner cylinder as possible:
 High-resolution image shot with a Canon EOS 5D MII
This design is much more open and doesn't suffer (as much) from clogging.
By the way, I printed several of these objects in brown as I was trying to use up some old brown filament I had laying around. Brown turns out to be an incredibly poor choice of color. It's the same color as the leaves that the pool sweeper picks up, so it's hard to see when the cannister is full or the strainer is plugged.
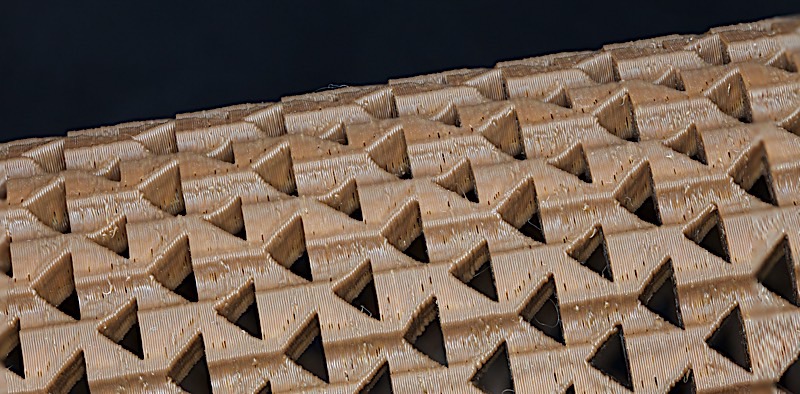
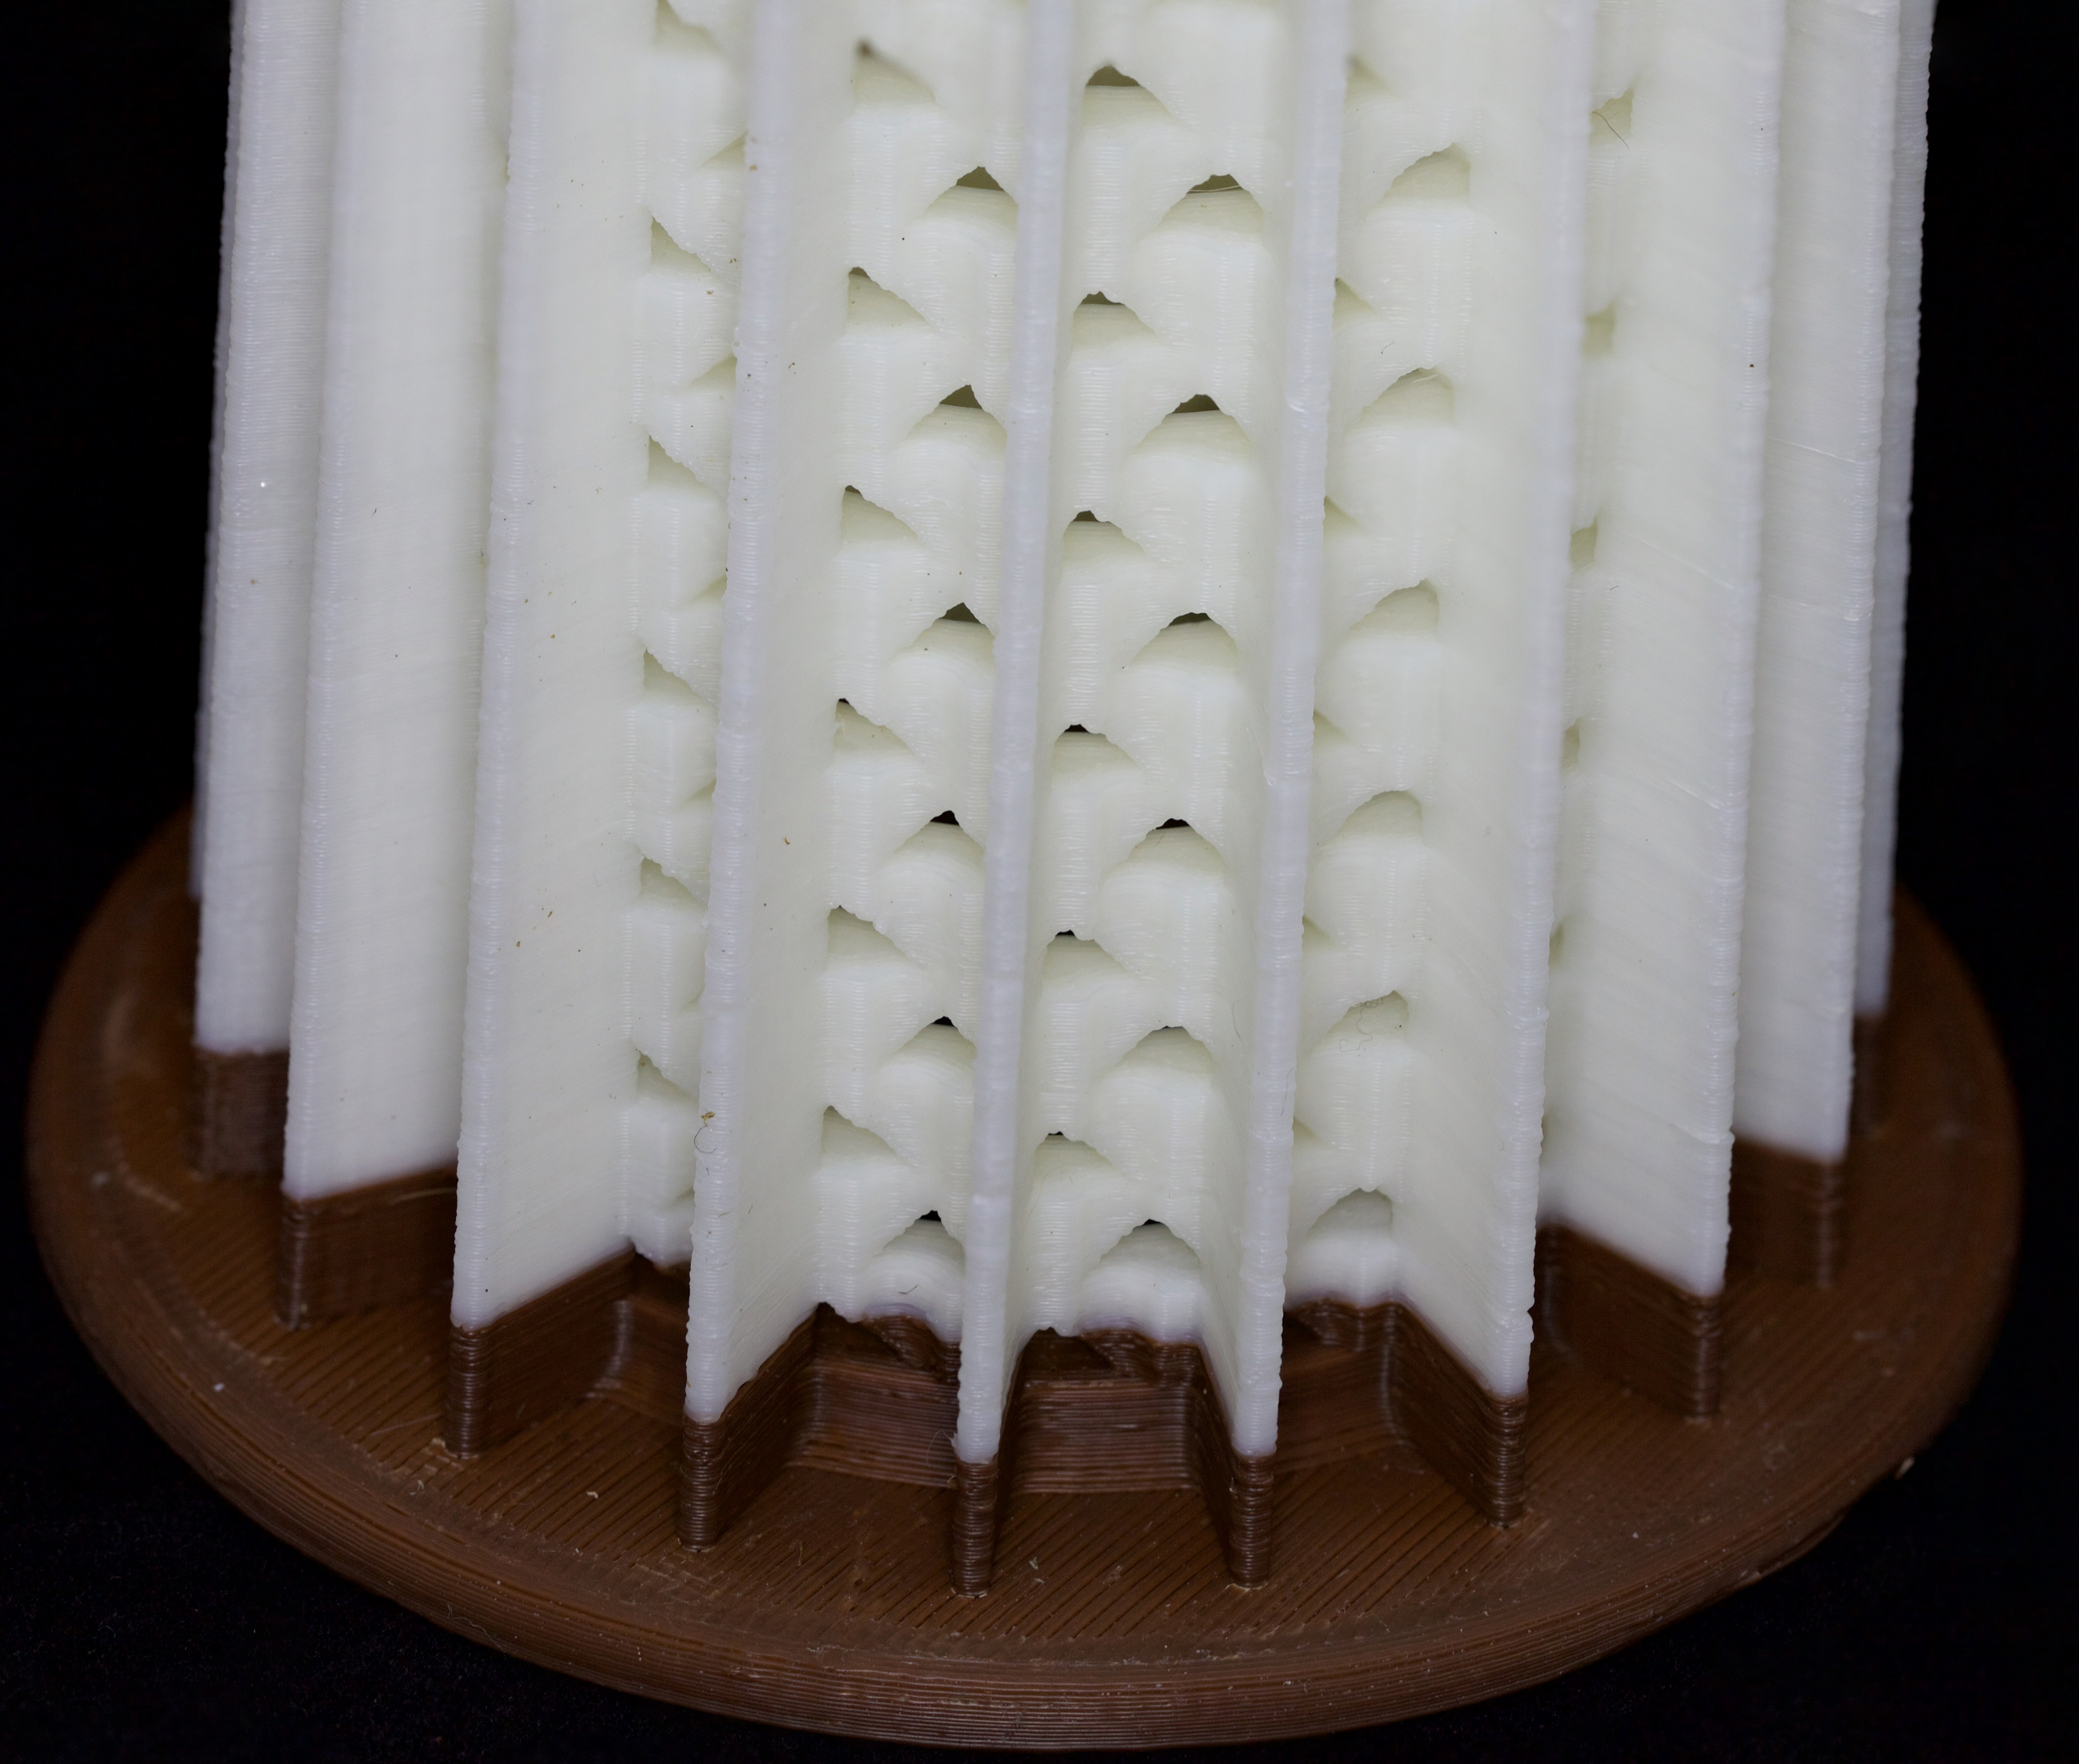
During the development of Version 7, I also added some ribs to the side of the strainer to improve water flow once the cannister started filling up.
High-resolution image shot with a Canon EOS 5D MII
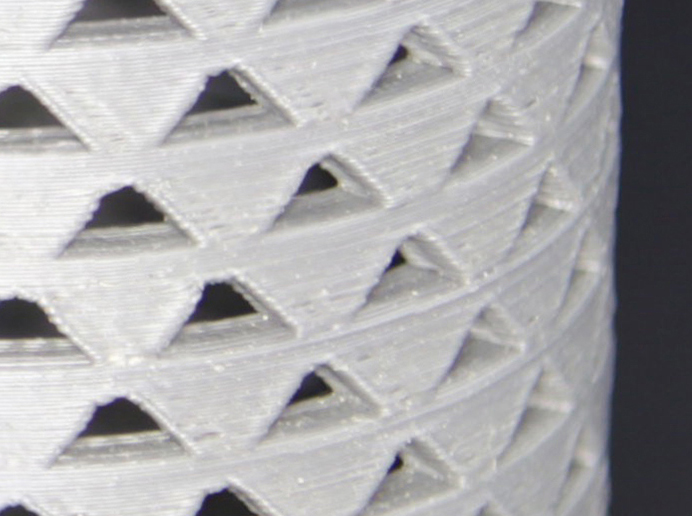
After using the strainer with ridges for about a week, I made a slight improvement. I added a second set of ridges to help block additional junk and added some holes on the ridges to increase water flow:
 High-resolution image shot with a Canon EOS 5D MII
One thing to note about the later versions of the strainer and bracket -- absolutely no support material is required. You may notice at the top of the bracket there are three short unsupported areas. However, bridging handles these gaps just fine. Yeah, if you look close the 3D printing under those arches is a bit rough but who cares? This is a pool filter not a piece of jewelry. You'll notice that my fast/medium quality print is a bit sketchy; yeah, it could be sanded or brushed with acetone. Once again, though, for a pool filter it doesn't really matter so I made no attempt to make these things looked like finished manufactured products.
Version 7 seems to be working fairly well. Now I've just got to operate the thing for six months and see how well it holds up.